
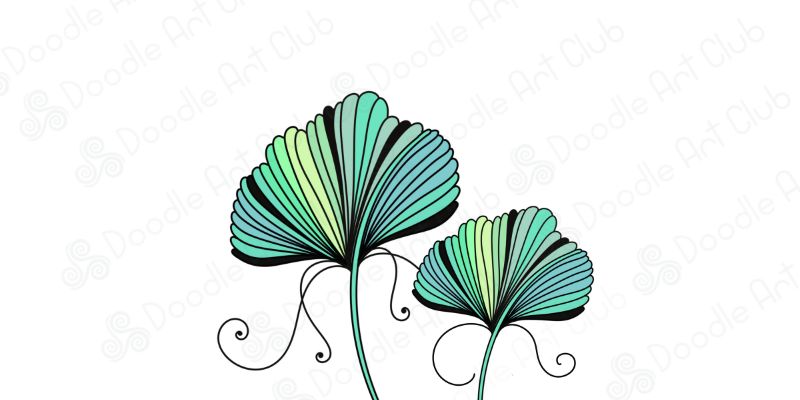
Looking for a creative way to relax and get inspired? This easy Ginkgo Leaves drawing tutorial is just what you need! With soft curves and a flowing, twisted effect, this pattern is calming to create and mesmerizing to look at. Perfect for beginners and seasoned doodlers alike!
Follow the steps below and learn how to draw a Ginkgo Leaves scratch. Let’s get started!
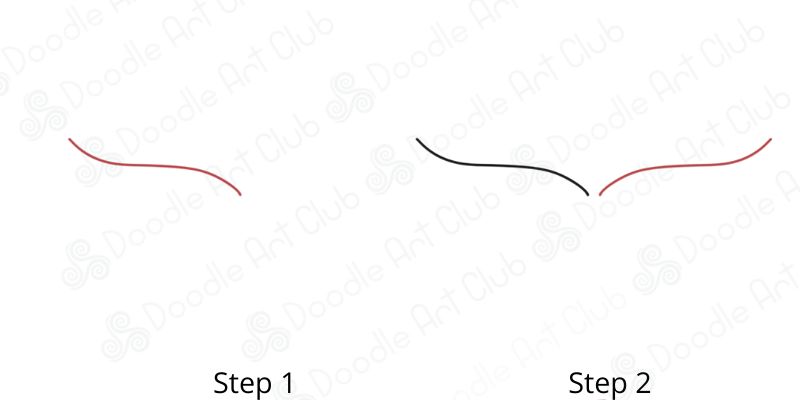
Steps 1 & 2
Draw a long, slightly curved line that swoops down gently like a stretched “S.” This will be the base of your left petal. Draw a matching curved line on the opposite side, mirroring the first. Now you have two symmetrical curves that look like a reversed curly bracket — like this – }. These will form the foundation of your flower.
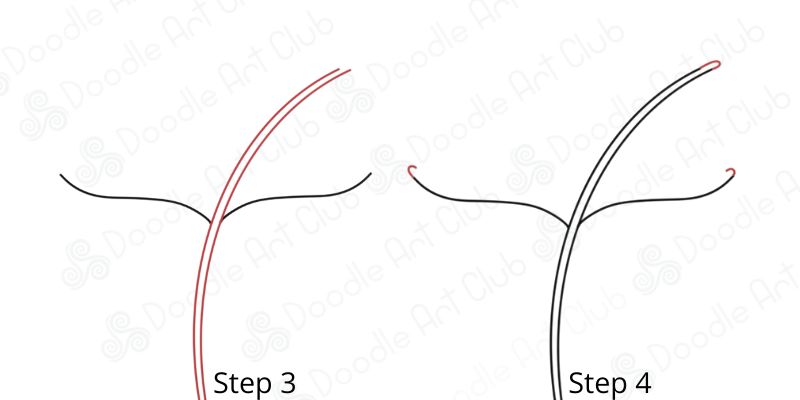
Steps 3 & 4
From the center point where the two curves meet, draw two long, arched lines extending upward. These lines should curve outward and then slightly inward, like the ribs of a fan. They will become the central veins of the petals. Close the petals by connecting the arched lines at the top with small curved tips. Add tiny curls at the bottom ends of the original curves to give the shape a decorative touch.
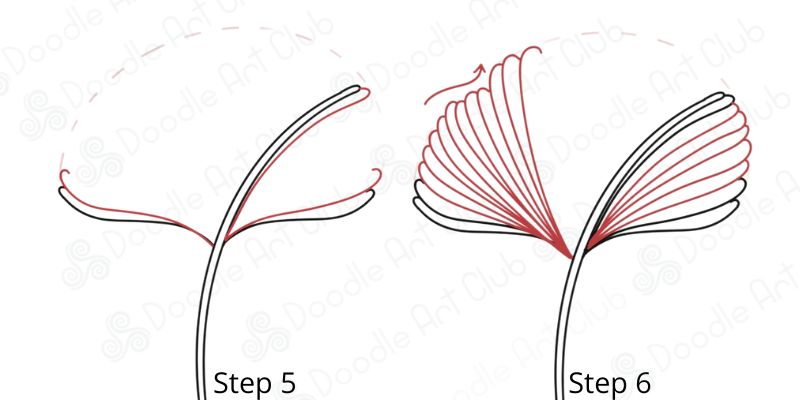
Steps 5 & 6
Start adding inner petal lines. Draw curved lines that extend from the bottom center outward and upward along the left petal, fanning them out to follow the petal’s shape. Repeat the same fanning lines on the right side, starting from the same central point. These lines give the flower volume and a sense of flow.
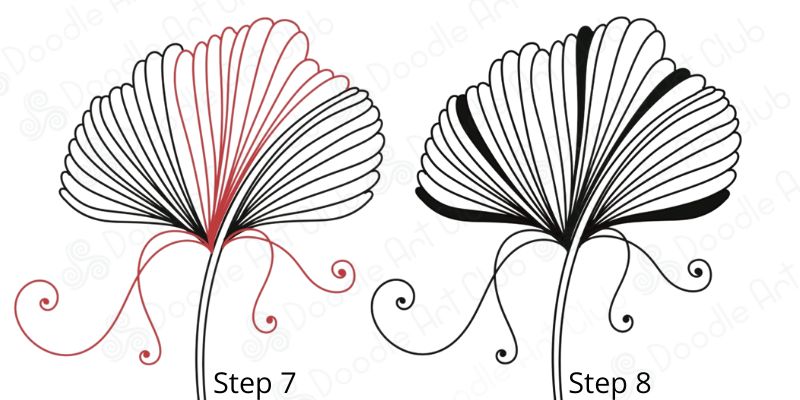
Now add some graceful curly tendrils beneath the flower. Draw long, smooth spirals extending
from the base, curving outward like decorative vines.
Final touches! Choose a few petal sections—preferably near the center or along one edge—and fill them with solid black ink to create beautiful contrast. You can also darken every third or fourth inner line to give it a bold, rhythmic texture. These inky accents will add depth and make your flower pop. Your elegant design is now full of character and ready to shine!
Steps 7 & 8
Step 9: Create a Full Composition
Now that you’ve mastered one elegant flower, it’s time to let your creativity bloom! 🌸 Start by drawing several versions of the same flower at different angles and sizes. Let some petals face upward, others to the side—just like in nature. Use curved stems to connect them, letting them weave and overlap naturally. Add more curly tendrils to bring rhythm and flow to the piece.
Don’t aim for perfection—aim for balance, movement, and expression. The repetition of the same motif creates unity, while playful changes in position and curve make your drawing feel alive. This is where your doodle turns into art. ✨ Let your hand move freely, let the pattern guide you, and enjoy the calm that comes with it. You’re not just drawing—you’re creating a dance of lines.
🎨 Artist Credit:
Inspired by the original work of Andrea Kennard
Instagram: @deliberatedoodling
✍️ Tutorial created by: Olga Dee
Instagram: @olgadee.art

Fantástico, super didáctico
Wow! Superb!Thanks.