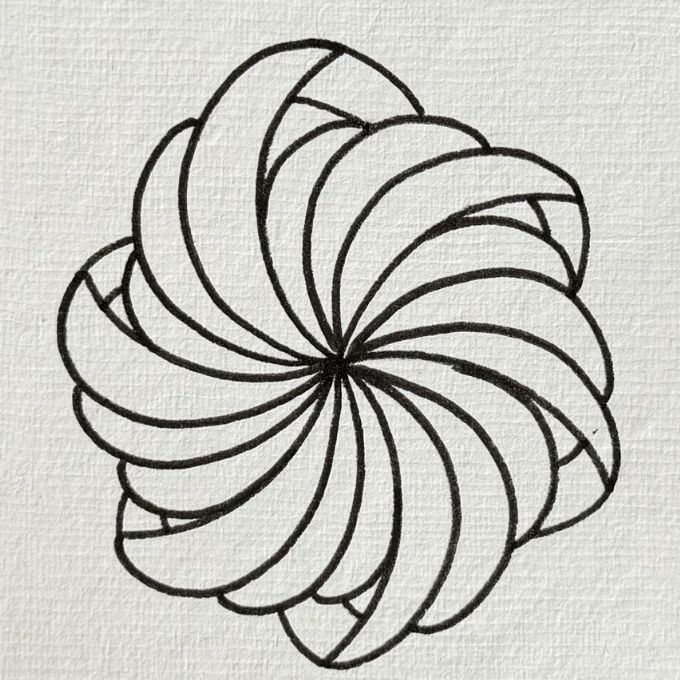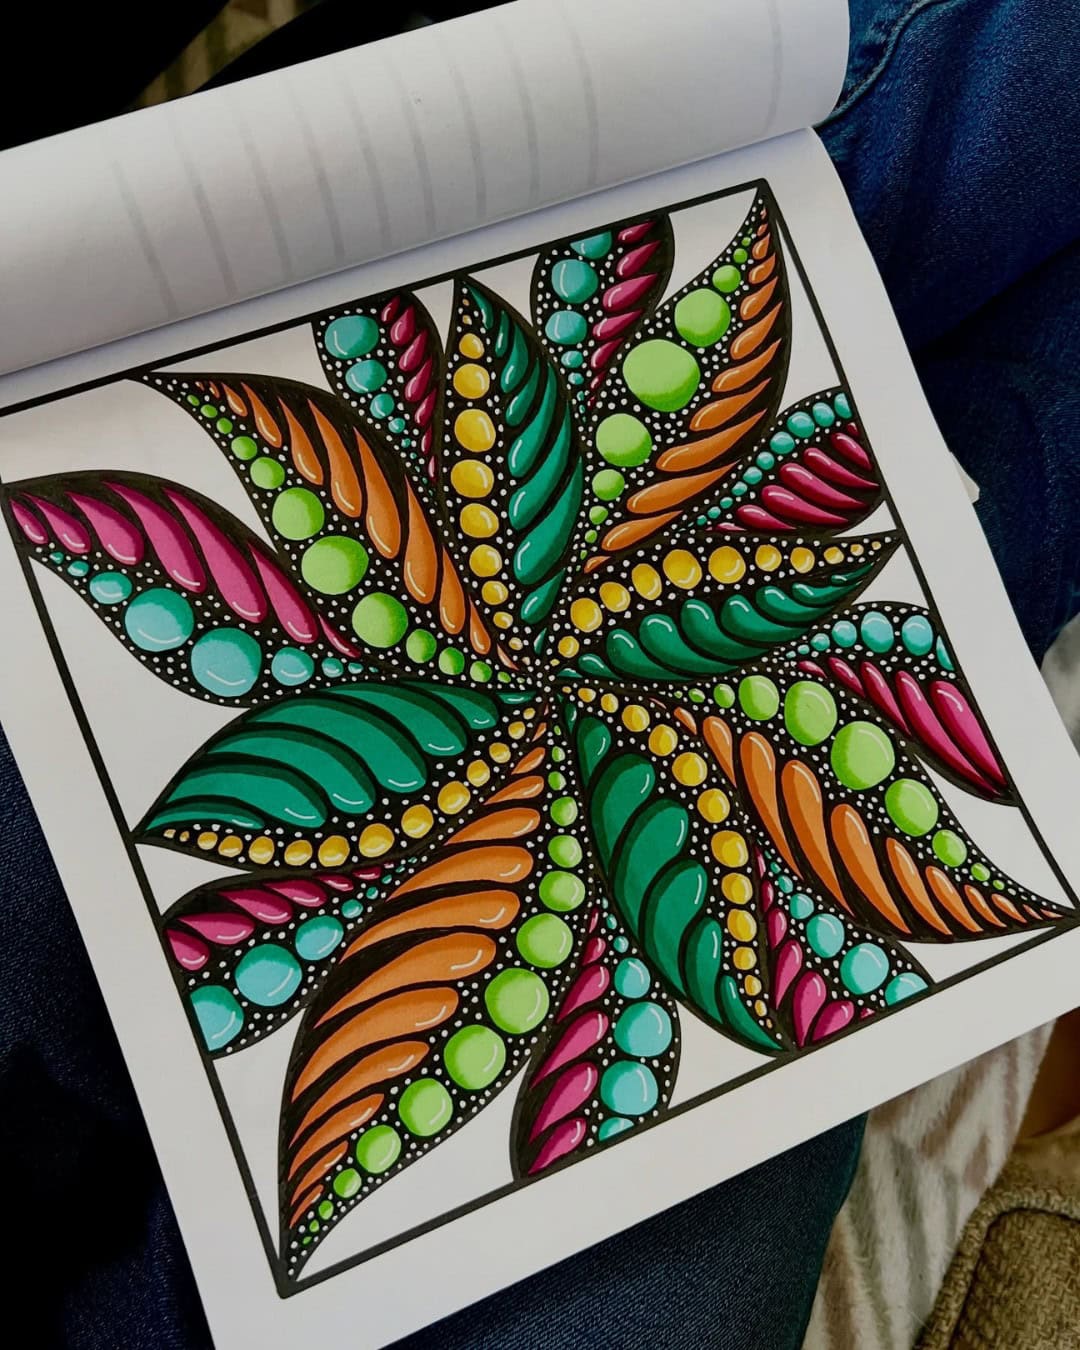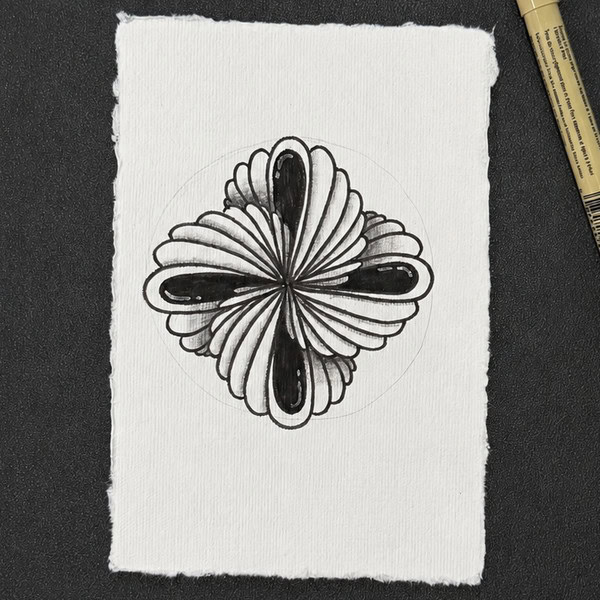
Some doodles look complicated until you see how they are built. This layered petal rosette is one of them — from a distance it reads as a dense, intricate bloom, but underneath it is just one shape drawn over and over around a single point.
That is the whole trick. You are not drawing a flower. You are drawing one petal, then turning slightly and drawing it again.
What you’ll need
- Paper — smooth printer paper or a sketchbook page both work
- A pencil — for the light guide circle you will erase later
- A fine liner — 0.3 mm or 0.5 mm gives the cleanest lines
- An eraser — a kneaded one lifts pencil without scuffing the paper
No compass needed. A slightly wobbly circle actually makes the finished rosette look more handmade.
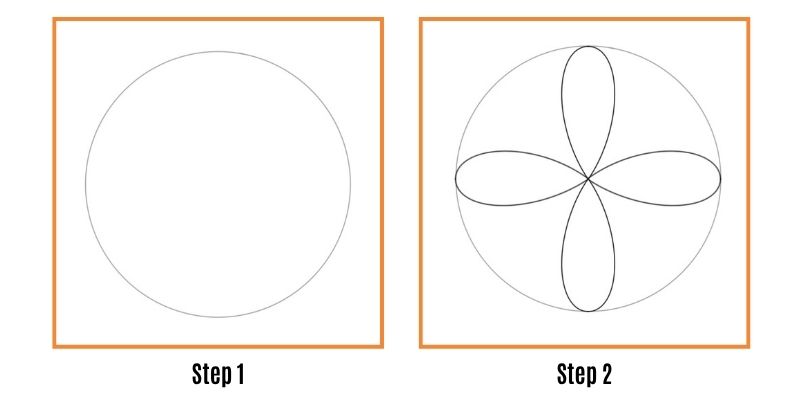
Step 1 — Draw a light circle. Keep it faint. This is a boundary, not part of the drawing, and everything you add next will grow inside it.
Step 2 — Add four long petals. Draw one tall, narrow petal pointing straight up from the centre to the edge of the circle. Then one pointing down, one left, one right. All four meet at the same centre point. You now have a simple four-petal flower.
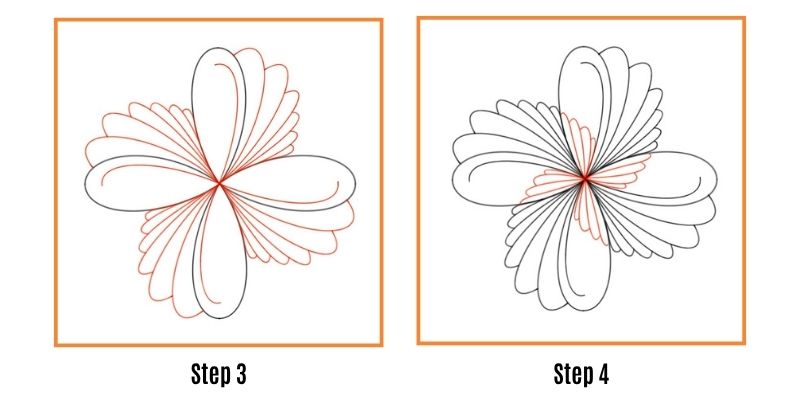
Step 3 — Fan out the narrow petals. Starting at the centre, draw thin petals that fan into the empty space between the big ones. Work outward in one direction so the spacing stays even. Each petal starts at the exact same point and ends a little short of the circle.
This is the step where it starts to feel like a pattern rather than a drawing. Let your hand find the rhythm.
Step 4 — Keep going around. Continue fanning petals into the remaining gaps, moving section by section. If one area looks thin, add a petal. If it looks crowded, leave it.
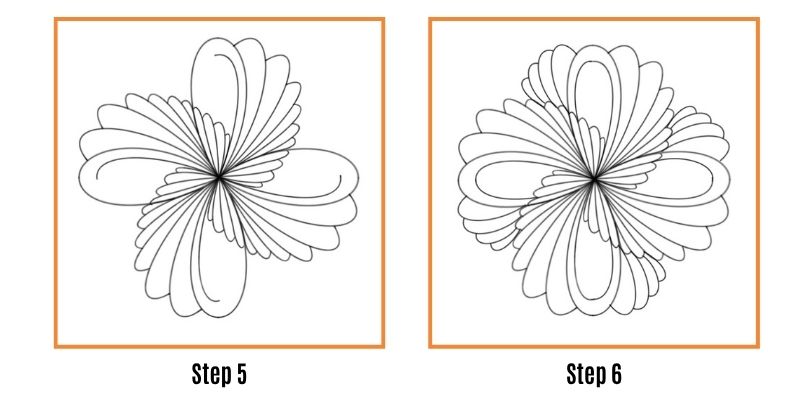
Step 5 — Even it out. Step back and look at the whole rosette. You are checking for balance, not perfection — a few petals slightly longer than others is what keeps it from looking machine-made. Erase your pencil circle now.
Step 6 — Add the outer layer. Draw a final round of larger, rounder petals over the top of the fan, echoing the four original directions. This layer gives the rosette depth and makes it read as a dimensional flower instead of a flat starburst.
Done. Go over your final lines in liner, let it dry, then erase any pencil that’s left.
Why this pattern is worth practising
Repetitive drawing like this does something useful to your attention. You are giving your hands a task simple enough to do without deciding anything, which is why so many people describe pattern work as settling.
There is some research behind the feeling. A 2016 study at Drexel University found that 45 minutes of art-making lowered cortisol levels in most participants — regardless of whether they considered themselves artistic. And psychologist Jackie Andrade’s well-known 2009 doodling study found that people who doodled during a dull listening task recalled noticeably more of it afterwards than those who sat still.
You do not need to be good at drawing for either effect. You just need to keep your hand moving.
Three ways to vary it
- Change the petal count — six or eight base petals instead of four gives a denser, more mandala-like rosette
- Change the petal shape — swap the pointed petals for rounded ones and the whole flower softens
- Add shading — a few short parallel lines along one side of each petal will make it lift off the page
Try the same six steps three times in a row with a different variation each time. Seeing them side by side teaches you more about pattern-building than any single perfect drawing will.
Keep going
If this rhythm appeals to you, the full method — building depth, shading, and layered botanical patterns from simple repeated shapes — is what our workbooks are built around.